One of the things I inadvertently enjoy in JRPGs is when they let me visit areas or face bosses who are absurdly stronger than my party at that point in the main campaign.
It’s like the game gives you a plausible excuse to justify our backtracking while still, occasionally, giving hardcore players a chance to beat this content way earlier than intended.
Related
Clair Obscur: Expedition 33: Complete Guide & Walkthrough
Come with us on the greatest expedition of all time!
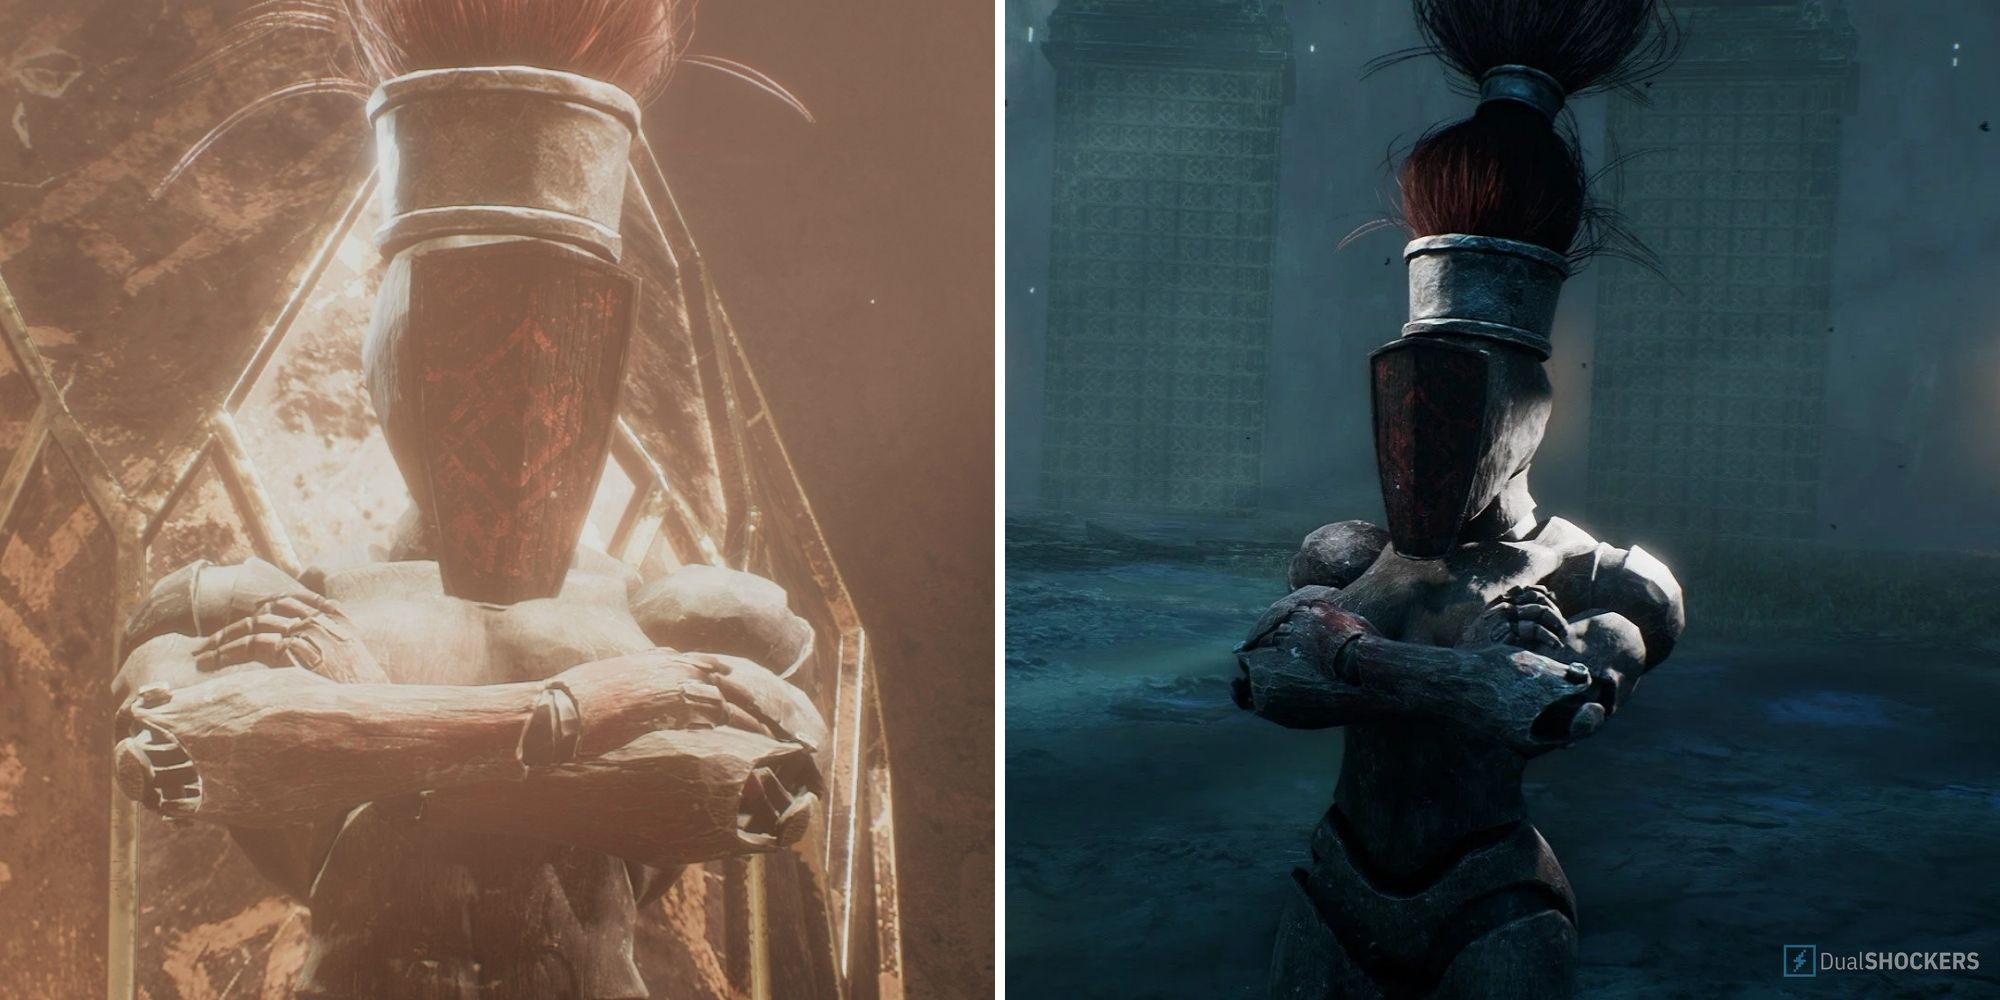
Golgra, the Gestral chieftain, is a secret boss fight unlocked at the beginning of Clair Obscur: Expedition 33. However, her challenge is inhuman for that stage of the game, which is why the community considers her one of the endgame bosses.
This guide will show you optimized strategies to defeat Golgra in Clair Obscur: Expedition 33, along with the best Pictos and skills for each character. Of course, in the endgame.
We face Golgra in three different instances, but this guide will focus on her optional fight in Gestral Village, which is by far the most challenging one.
Preparing for Golgra

The biggest difference between Golgra and the other endgame bosses in Clair Obscur: Expedition 33 is that we fight her in a duel, meaning each character faces the Gestral chieftain in a 1v1 battle.
That’s why there are two variables to consider here: each party member’s individual level and how much you’ve invested in them. For most party members, this won’t be an issue. However, if you haven’t been actively hunting skills with Monoco during your playthrough, I’ve got bad news for the feet lover.
Despite each party member having their own mechanics and abilities, the preparation to face Golgra is pretty much the same. That’s because of several Pictos that benefit solo fights, ones we’re going to lean heavily on to break the joints of this wooden doll.
Best Pictos Against Golgra

Unlike other boss fight guides here, this one won’t have the best party composition because we don’t fight as a party. That’s why I’ll dedicate a section to explain which Pictos are best for the solo fight, their benefits, and where to find them.
There are five Pictos you absolutely need to grab and learn their Luminas to make the fight against Golgra easier. Luckily, they are all found in the Hidden Gestral Arena, which also serves as a warm-up for duels.
You can access the Hidden Gestral Arena as soon as you leave the Flying Waters. Using the World Map as a reference, walk all the way west, ignore Abbest Cave, and when you get close to some yellowish vegetation, you’ll find the entrance to the arena.
There are five challengers in the arena. From the first to the last, they get progressively more challenging. Still, beating each one rewards you with a Picto that gives you an edge in solo fights, and these should be equipped as soon as earned.
The best Pictos and Luminas for solo fights in Clair Obscur: Expedition 33 are:
As you can see, all the effects of these Pictos benefit solo fights. Your characters will deal more damage, become faster and tankier, and every attack will be critical, which is a massive boost. Still, not enough to face her in the early game, young Padawan.

Related
Clair Obscur: Expedition 33: 10 Best Pictos If You Suck At Parrying
Complaining because developers added reactive actions to a turn-based RPG? I got you.
My suggestion is to fight her in the endgame, during Act 3, mainly because of Pictos like Painted Power. I also recommend that you defeat bosses like Sprong to get the  Cheater Picto, the best in the game, and if you’re feeling up for it, kick Serpenphare’s ass to acquire
  Energy Master.
These two Pictos will give you a fantastic edge against Golgra, allowing you to attack twice per turn – or heal – while maintaining a solid AP reserve. Also, don’t forget  Second Chance, but you should already be using it since the end of Act 2.
Best Skills

I’ll list here which skills I predominantly used with each character, explaining why I considered them the best and also my winning strategy. Truth be told, I focused exclusively on the ones that deal the highest damage possible.
In case things were going south, I used a Health Tint to heal myself or an Energy Tint to recover AP instead of using basic attacks. The damage dealt with a normal attack is laughable compared to the AP gain if your Energy Tint is upgraded.
Verso

|
Skill |
Description |
|---|---|
|
After 1 turn, deals extreme single target Physical damage. 13 hits. Interrupted if any damage taken. S Rank: Increased damage. |
|
|
Deals very high single-target Light damage. 1 hit. Can Break. Rank S on Break. B Rank: Costs 5 AP. |
 Steeled Strike
 Perfect Break
There’s not much of a secret with Verso. With Cheater, you can set up Steeled Strike in one turn and execute it in the next, dealing massive damage. If Golgra’s Break Damage starts going up, use a Perfect Break to stun her and push your perfection rank to S.
Sounds simple, and it is. I killed her in one turn, not even seeing her enter Rage mode. But if you can’t pull that off, that’s when Perfect Break comes in. Besides also dealing devastating damage, gaining an extra turn against her while she’s stunned will help seal the win.
Maelle

|
Skill |
Description |
|---|---|
|
Reduces self-Health to 1 but refills all AP. Switches to Virtuose Stance. |
|
|
Change Stance: Stanceless. Deals extreme single target Void damage. 1 hit. Removes self-Shields and self applies Defenceless. |
 Last Chance
 Stendahl
My strategy with Maelle is the same as always, including the one I used to defeat Simon, the strongest superboss in Clair Obscur: Expedition 33. It boils down to casting Last Chance on one turn and Stendahl on the next.
I know Stendahl got hit with a big nerf in one of the RPG’s updates, but it’s still insanely powerful. I was able to flatten Golgra with just one attack using this combo. Now, you might need to run this combo twice.
Lune

|
Skill |
Description |
|---|---|
|
Deals low single target Ice, Fire, Lightning, and Earth damage. 4 hits. Critical Hits generate the corresponding Stain. |
|
|
Deals extreme damage to all enemies. 8 hits. Each hit deals damage in a random element. Can only be cast with Fire, Ice, Lightning, and Earth Stains. |
|
|
Consumes all stains to deal high elemental damage to the target. Can Break if 4 Stains are consumed. |
 Elemental Trick
 Elemental Genesis
 Mayhem
For the longest time, I used Lune just as a party support. What a mistake that was. A combo between Elemental Trick and Elemental Genesis is one of the strongest offensive moves in the entire game.
The catch is that for it to work, you need a Lune built around Critical. But remember, since this is a solo battle and you’ve got Last Stand Critical, all your attacks have a 100% crit rate. So when you use Elemental Trick, it will generate four stains, one for each element.
With that, you’ll be able to unleash Elemental Genesis, which requires one stain of each primary element. Equip Lune with Mayhem as well to break Golgra whenever possible.
Sciel

|
Skill |
Description |
|---|---|
|
Deals medium single target Dark damage. 2 hits. Applies Mark to the target. Applies 3 Foretell. |
|
|
Deals extreme single target Dark damage. 4 hits. During Twilight extends Twilight duration by 1 turn. Consumes all Foretell to deal additional damage. |
|
|
Deal extreme single target Dark damage and applies 10 Foretell. 1 hit. Can Break. |
 Marking Card
 Twilight Dance
 Final Path
Sciel was the one I struggled with the most because I feel like none of her attacks have a powerful initial burst damage. She needs to build Foretell, sometimes apply buffs, enter Twilight, and only then start causing havoc. But by the time I reached that stage, Golgra had already kicked my face in with her capoeira skills.
My strategy with Sciel was to slowly apply Foretell with the Marking Card, alongside a bonus Mark, while ramping up my Sun charges. Next, I nailed a Twilight Dance to deal damage and enter Twilight mode.
While in Twilight, I kept spamming Marking Card until stacking 20 Foretell on Golgra. Then Twilight Dance again to refresh Twilight and spend all Foretell for massive damage. Bring Final Path in case you need to Break Golgra or if you’re with an AP surplus.
Monoco

|
Skill |
Description |
|---|---|
|
Deals low single target Dark damage. 1 hit. Can Break. Agile Mask: fills 20% of the target’s Break Bar. |
|
|
Deals high Ice damage to all enemies. 3 hits. Applies Slow to the targets for 3 turns. Balanced Mask: Increased damage. |
|
|
Deals extreme Void damage to random targets. 3 hits. More damage if the same target is hit multiple times. Caster Mask: Increased damage |
|
|
Deals extreme single target Physical damage. 4 hits. Can Break. Almighty Mask: Increased damage. |
 Ramasseur Bonk
 Chevaliere Ice
 Creation Void
 Duallist Storm
There are two moments in Gestral Village where Monoco faces Golgra. One of them happens if you set him as party leader and talk to her, prompting a fight. This fight is way easier than usual, but the rewards are lacking.
If you want to win our friendly Gestral a brand-new weapon, then you’ll need to provoke her into a duel and pick Monoco as the challenger. That’s when the difficulty spikes.
The problem with Monoco is that, as I mentioned, if you neglected him and didn’t go hunting for his skills, the battle might be tougher than it already is. There are also several builds for Monoco, so I’ll focus on the one I used to win, and even then, it was the toughest fight.

Related
Clair Obscur: Expedition 33: All Petank Locations & Rewards
Time to score some extra rewards by hunting Petanks.
My focus with Monoco was skills like Ramasseur Bonk and Chevalière Ice to break Golgra while debuffing her. I could attack like four times before her whenever she was slowed. The goal in breaking her is to make the most out of  Urnaro‘s passives. You can cast Creation Void while in Caster Mask for some extra damage.
With Urnaro, Monoco automatically enters Almighty Mask once an enemy is broken. Meaning you can use skills such as Duallist Storm at your leisure for max damage. Also, Urnaro’s level 20 effect increases Break damage by 50%, boosting this strategy even further.
I suggest always using skills that move the Bestial Wheel toward Almighty Mask, refilling Monoco’s AP either with Tints or attacks, and then spam skills that benefit from this mask. Rinse and repeat, pray, and victory will come.
Golgra Attack Breakdown

Just like the other Gestral, Golgra uses hand-to-hand combat to wipe the floor with our bodies. But not this time, because you’re more than prepared by following my guide.
Yet, it might take a few tries before you get the hang of her attack timing. Her patterns are erratic, and the animation is often misleading, making you think it’s one move when it’s actually another.
Like many endgame bosses, once you get used to her moveset, Golgra taps into some Super Saiyan energy and enters a second phase. She adds extra hits to her combos, and the speed at which she executes them may trick even those forged in the endless death cycles of Sekiro.
First Phase

In the first phase, Golgra uses several fast combos, including a Gradient Attack whose window for parry is relatively short. Still, her moveset is somewhat easy to learn.
Pay attention to the phrase indicator rather than her animations because many attacks look similar and can throw you off. If you know what to expect, it gets easier to fight back.
I’ll always recommend parrying because, besides giving 1 AP per hit, countering deals tremendous damage. Even so, start with dodging until you learn the timing for each move, then switch to parry.
|
Attack Phrase Indicator |
Attack Description |
Action |
|---|---|---|
|
“Golgra is dancing around.” |
Golgra does a flipping kick way-too-fast Gradient Attack. |
Gradient Counter |
|
“Golgra performs a fast combo.” |
A very fast 3-hit kick combo, but easy to avoid. It’s similar to the impressive combo, so pay attention to the indicator. |
Dodge or Parry |
|
“Golgra performs an impressive combo.” |
Groga performs a 4-hit kick combo. The first two kicks will take her into the air, where she’ll give a double kick before finishing with a roundhouse one. |
Dodge or Parry |
|
“Golgra attacks swiftly.” |
Oddly enough, this is the slowest attack in her arsenal despite the indicator. It’s a 3-hit combo. First, an air kick, then a somersault, and a diving one. |
Dodge or Parry |
These are all the attacks from the first phase. Once you take down 50% of Golgra’s HP, she will get angry, her hair will pop out of the ponytail and go spiky, and her body will burst into flames. Not ideal for someone made of wood, I guess.
Second Phase

In the second phase, Golgra will pretty much use the same attacks but add more hits. They will also deal more damage, and possibly, she will be faster, meaning more turns for her.
Keep the same offensive focus and continue dodging or parrying her attacks. I recommend parrying only if you need to build AP because, since they are all multi-hit strikes, the chances of nailing a counter are slim, and it’s not worth the risk.
|
Attack Phrase Indicator |
Attack Description |
Action |
|---|---|---|
|
“Golgra performs a long combo.” |
Golgra will perform a 6-hit combo. The first four hits are the same as in the fast combo, but then she will add two more flamboyant kicks. |
Dodge or Parry |
|
“Golgra performs a long combo.” |
A 4-hit combo that starts with the same pattern when she attacks swiftly, but now there’s a roundhouse kick as a finisher. |
Dodge or Parry |
|
“Golgra performs a crazy combo.” |
A 6-hit combo and the worst attack ever. Golgra will perform several erratic kicks that can really throw you off. Good luck. |
Smash the Dodge button |
|
“Golgra shakes the earth.” |
Golgra will first jump, prompting a Jump Dodge, and then do a Gradient Attack. The easier move to avoid. |
Jump and Gradient Counter |
How To Beat Golgra

In hindsight, the biggest challenge when facing Golgra is getting the timing down for her erratic combos. I know that sounds obvious because learning any enemy’s moves in Expedition 33 makes the fight easier, but with her, dodging is tough even after memorizing her combos.
That’s why all my suggestions focused on cranking your offense to the max. As Wolverine says, the best defense is a good offense, and a dead Golgra won’t be able to throw crazy combos at you.
As I mentioned in the Best Skills for each character section, your only goal here is to hit as fast and as hard as possible. There’s no real strategy because, in a solo battle, the only tip is to survive.

Related
Clair Obscur: Expedition 33: 10 Hardest Bosses, Ranked
The Continent is full of painted baddies that will knock you back.
Make sure to bring all the Solo Pictos and, if possible, the endgame ones, such as Cheater and Energy Master. It’s also possible to go all in on a damage-focused build and kill Golgra before she even gets a turn, which is exactly what happened in my Maelle and Verso’s fights.
If you’re struggling to dodge her attacks, bring Pictos like Base Shield for an extra layer of defense or even In Media Res. Every single one of Golgra’s attacks was a one-hit KO on my characters, so the side effect of the Lumina cutting my max health in half didn’t even matter.
With strategy, dexterity, and a bit of luck, you’ll soon defeat Golgra and steal the Gestral emperor’s throne for yourself. Don’t forget to bring the proper haircut and your Sakapatate outfit.
Rewards

Every victory against Golgra will earn you experience (way more before the day one patch), sometimes a Recoat, and always crafting materials. Each character who wins the duel will also get a weapon or level it up if they already own it.
Before the day one patch, I used Golgra as my personal punching bag to grind my characters all the way to level 99 because the XP gain was insane. However, Sandfall Interactive dropped a patch and nerfed the gains.
Even so, it’s still worth fighting her to farm crafting materials and to get or upgrade one weapon for each party member.

Related
Clair Obscur: Expedition 33 Vs. Persona 5 Royal: Which Game Is Best?
Two massive and influential turn-based RPGs, but only one clear winner.

Clair Obscur: Expedition 33
- Released
-
April 24, 2025
- ESRB
-
Mature 17+ // Blood and Gore, Strong Language, Suggestive Themes, Violence
- Developer(s)
-
Sandfall Interactive
- Publisher(s)
-
Kepler Interactive
- Engine
-
Unreal Engine 5